Google Analytics tags

Friday, December 25, 2020

Getting Inside the Doors to Replace the Failing Exterior Door Pull Gaskets, to fix latches, locks, window lifts, or modify check-straps


Getting inside the door cavity is part of the process to fix latches, locks, window lifts, and check-straps.  The below procedure is to replace the pull handle gaskets. The process includes how to get into the door cavity for any number of other servicing items. 

Getting inside the door cavity:

  • Pull the interior door card, which requires a Phillips screwdriver and an Allen Hex key, Remove all the Phillips head screws and finish washers on the door card, door pocket, and surrounding the speaker box for Premium Sound equipped cars. There are a lot of them, note their size, length, and position for reinstallation later;
  • For Premium-Sound equipped cars remove the speaker box cover and the speaker box Phillips head mounting screws, unplug and remove the speaker box;
  • Remove the Phillips screw inside the door pocket holding it to the door pull handle frame.
  • Remove the larger Phillips screw underneath the forward-most part of the door pull-handle frame that holds the frame in place at the front of the door;
  • Release the interior door pull rod by pulling on the interior door release paddle and reaching behind it and slipping the rod off its attachment to the backside of the paddle
  • Unscrew the two large recessed socket head capscrews holding the interior pull handle frame. They are deeply recessed in the two holes in the frame behind the pull handle paddle.
  • Lift off the door handle frame;
  • Remove the door card while unplugging the door speaker harness for non-Premium Sound cars.
  • Slit the plastic door cavity sealing film behind the door card to reach into the door cavity. Make more than one slit to facilitate ease of access for later steps. When done working, seal up the slits using clear packing tape. Trying to pull the original cavity sealing film back from its edge to avoid putting a slit in it tends to be problematic when trying to put it back in place when you are done;
Removing the rain shroud that covers the lock mechanism & door pull mounting nut:
  • Remove the two very small Phillips screws in the latch side (B Pillar) door's jamb facia. These very small Philips screws hold an internal plastic rain shroud over the interior lock mechanism. The shroud hides the latch mechanism and also needs to be removed to gain access to the exterior door pulls mounting nuts;
  • Removing the shroud can take a while and it requires some flexing to remove and reinstall. Take your time flexing the shroud, and eventually, you will get it out and later back in position so it can be reattached with the two small screws.
Servicing the exterior pull-handle, lock cylinder or handle mounting gaskets:

 
The two gaskets you will need to order are 993-537-621-00 and 993-537-631-00 one each for each door left or right.
  • Remove the two small hex nuts on the interior of the door to release the pull handle from the door skin. No biggie. Put a rag in the bottom of the door cavity to avoid losing one of the nuts if your hand slips. The M5 nut is part number 900.380.001.02 in case you lose track of one.
  • Use a good amount of masking tape on the outside of the car to tape the exterior door pull in place so when released it doesn't fall to the floor and get damaged. It might be a good idea to put a piece of carpet below the door on the floor in case the tape fails.
  • Once the nuts have been removed the door pull simply lifts off the exterior door skin, pull, lever & Lock cylinder mechanism all in one piece. 
  • Keyway Cap/Plug
    Once the door pull is detached its casting cavity and the lock cylinder mechanism can be cleaned of accumulated debris, the mounting gaskets can be replaced, the pull reinstalled and the door buttoned back up.
  • As a finishing touch, the little black plastic keyway cap /plug
    for the outside of a 993 door handle can be purchased under part number 993.537.613.00
If you found this page informative return to the main page and bookmark it for future 993-related servicing, repair, upgrading guidance, and information. If it saved you some time, aggravation or even some coin consider a donation through the button on the top left margin of this page.

Door
Door Panel
Inside
Door Card
Door Speakers
Door Lock

Sunday, September 27, 2020

Wednesday, September 23, 2020

Stuff I've added to my 993

 OK here are the mods I have done to my 993 many involve how-tos covered in the pages of this BLOG. Not much really just normal stuff to enhance driving enjoyment...

Saved all OE components switched out to be delivered to the next owner with the car, probably by my son as I plan to be dead when that happens!


Tags:
#993Technical
#993TechnicalSupport
#993Support
#Porsche993Help
#Porsche993Technical
#PorscheService
#PorscheRepair
#993Service
#993Repair
#993Parts
#ServicePorsche
#RepairPorsche
#Service993
#Repair993
#993 Ugrade 

Monday, September 21, 2020

Items I have serviced on my 993

A 993 is a very well made vehicle but over 26+ years of being on the road what may seem like a lot of stuff needed attention. Here is a list of the stuff I have had to service over the years. It also includes a few things I have not serviced but are common service & repair items on a 993.

Servicing the Dual Distributor - Avoiding engine damage 

Restoring the operation of the cabin air recirculation button -  maximum cool in the Summer 

Lighting \Alarm\Immobalizer Problems - Annoying fob & alarm issues

Surface corrosion and paint gouges - Keeping things lookin' nice

Corrosion around the windshield and rear window -Avoiding an expensive body shop fix

Restoring the working distance of the Remote Entry Fobs - Fixing an annoying issue

Repairing the Oil Cooler and AC Condenser low-speed fan -- Keeping things cool in hot weather

Heating Ventilating Air Conditioning (HVAC) issues  - Keeping things warm and cool when they should

Squeaks & Rattles - fixing annoying sounds in an otherwise quiet body

The Air Bag Light (SRS) & Seat Belt warning lights  - Get the light to go out

Turn signal flashing too fast - Yup, something is not right

Non-Functional Window Switches - A kitchen table fix

Horn Honking Without Reason. - Very annoying especially in the rain

Car won't start, the DME Relay - The number one reason a 993 won't start

Oxygen Sensors & Engine Management - How they should work

Ignition Key & Lock - Fix it, don't replace it

Electrical Gremlins & Sensors - Annoying problems

Check Engine Light - Emission Control System  - Yes why we have OBDCII

Insidious Poor Running or Power Robbing issues - Stuff to make your 993 run right!

The Odometer a Known Issue - Suddenly not working you say?

Brakes & Rotors - Yes the 993 has them

Noisy Fuel Pump - A simple and inexpensive fix

Ignition Issues & Misfires - Very annoying

Hydraulic Lifter Noises - Nasty noises at start-up?

Manual Transmission - Knowing when to service this

Clutch Issues - A once or twice in the life of the car issue

Door seal replacement - An inexpensive fix

Door popping sound - check strap failure  -  Fix it before it becomes expensive to fix

Heating Ventilation Air Conditioning, known issues - Yup it's complicated

Suspension & Steering - Part of why we love these cars

High Mounted Stoplight bulbs out - Does it look like it has lost some teeth?

Body & Paintwork repairs - What you really need to know before going to the body shop

Leather edge of hardback seats coming  lose  -- An easy fix

HVAC Issues

Batteries & Charging

Ride & Suspension

Alarm & Lamp; Ignition Immobilizer Gremlins

Dual-Mass & Lightweight Flywheels poor running and...

Mass Air Flow Sensor MAF OBDC code & poor running

Remote Entry Key Fob Programming 

Replacing the rear wheel arch protective  film

Replacing worn seat upholstery

Fixing up/down window switches

High mounted Cyclops light wire fix

The airbag warning light

Replacing the Steering Rack 


Tags:
#993Technical
#993TechnicalSupport
#993Support
#Porsche993Help
#Porsche993Technical
#PorscheService
#PorscheRepair
#993Service
#993Repair
#993Parts
#ServicePorsche
#RepairPorsche
#Service993
#Repair993
#993 Ugrade 

Sunday, September 20, 2020

Testing & Removing and Reinstalling the Dual Distributor for Servicing

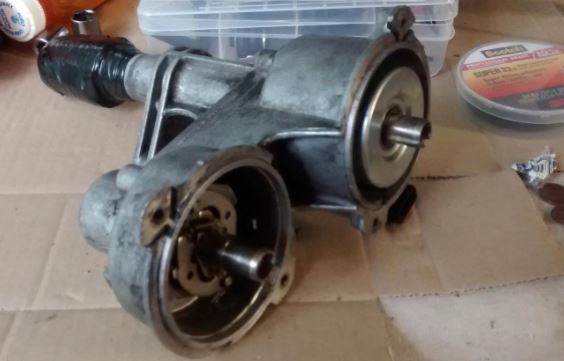
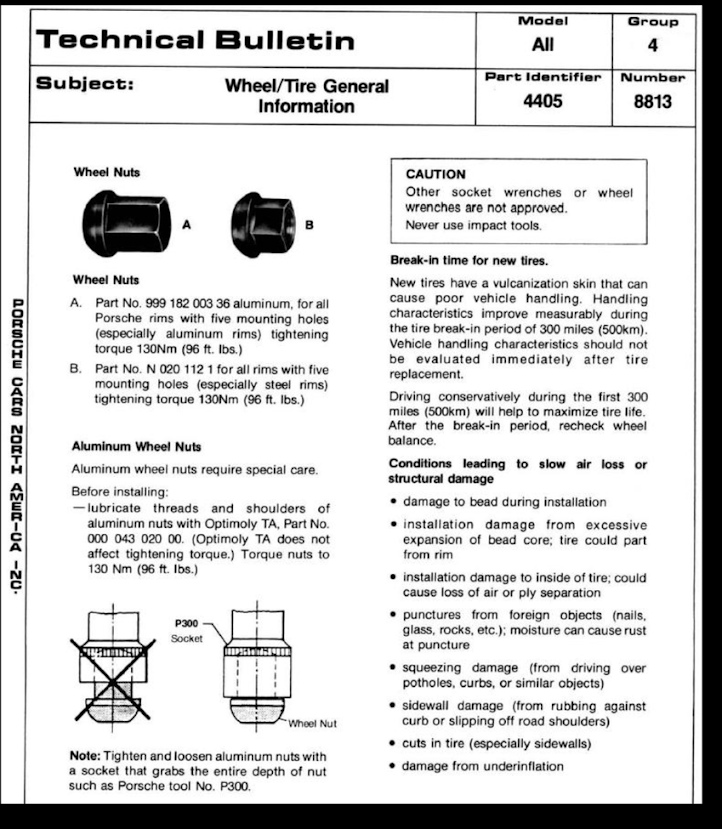
 Ignition Distributor & Distributor Belt Testing & Servicing


The 993 has two spark plugs per cylinder driven by a pair of Ignition Distributors and high voltage coils. All these components are over 25 years old and can be the source of a Check Engin Light or in the case of a broken distributor belt can result in engine damage. 

One distributor is directly gear-driven off the engine the other is belt-driven off the gear-driven one. The belt becomes brittle with age and should be replaced every 60K to 80K miles. 

If the belt is broken it can cause an out-of-time spark that can damage the engine. It doesn't always throw an OBD Code or a check engine light (CEL) as a warning. For this reason any time, there is a change in the smoothness of the engine's running, a misfire CEL,  an apparent backfire or at least at the beginning of every driving season the belt should be checked. 

If the belt is found to be broken on your car and you intend to take it to the shop for repair unplug the left-hand distributor cap's center wire before driving the car to avoid engine damage from an out-of-time spark.

Testing the ignition system & distributor belt for spark:
  • With the engine off and the key out of the ignition unplugging the directly attached distributor's center wire, and see if the engine runs. The directly attached distributor is the one on the right closer to the engine. If the engine starts and runs at all the belt is intact and the high voltage system related to the belt-driven distributor is working. 

  • With the engine off and the key out of the ignition reattach the center wire and pull the center wire on the belt-driven distributor on the left, furthest away from the engine, and see if the engine starts and runs on the directly driven distributor alone. If it does one knows this leg of the high voltage ignition system is also functioning. 

If the car won't start with the center wire on the right-hand distributor detached the distributor belt is most likely broken. Verify this by removing the key from the ignition and removing the left-hand distributor cap and see if the rotor can be rotated with gentle hand force. If it moves at all the belt is broken. 

The belt can break from becoming brittle with age or exposure to ozone trapped inside the distributor housing or some of the bearings in the distributor failing and putting too much force on the belt or both. 

Some like to replace the belt in the distributor on a Do-It-Yourself basis. For me, the problem with this approach is a distributor on a car with over 80K miles on it probably needs some additional parts such as a specialized bushing, bearing, or washer. Identifying much less sourcing these parts once the distributor is out of the car and on the bench can present challenges, one being one's 993 is now inoperative until one can find the part(s) they need.

In any event, the distributor needs to be pulled and sent out to have the belt and any other failed mechanical components replaced. Proven sources of repair are listed on this page.

Removing the distributor for servicing:

Below is how to remove and reinstall the dual distributor preserving its correct rotational position and in doing so also preserving the engine ignition timing when sending one's distributor out for service. 

Read the below instructions carefully in their entirety before attempting this procedure.

  • Chock the wheels of the car, apply the hand brake, and put the transmission in neutral. The car should not be moved until the refreshed distributor is reinstalled. This is to avoid the unintended rotation of the engine between when the distributor is removed and when it is reinstalled.

  • Remove the center coil distributor wires on each distributor cap and tie the caps with the spark plug wires attached clear of the work area. 

  • Remove the lower duct from the heater blower and the upper duct part that vents out of the engine compartment grill leaving the remaining duct that attaches to the blower in place. 

  • Take a strait-down picture of the directly attached distributor on the right (closest to the engine) with its cap removed and its rotor in place to document the rotor's rotational position. 
    Rotor Installed Position

  • Use care to make sure your camera's lens is exactly centered over the rotor so no off-axis picture distortion of the rotor's position is recorded in the picture. See the picture to the right.

  • Remove the Distributor's hold-down nut that locks the distributor to the case at the base of the directly driven distributor.

  • Then use a crowbar to pop the distributor loose without removing it. To do this the crowbar's claw is positioned
    Crowbar Position
    in Red
    on the underside of the right-hand 
    distributor body next to its center shaft and the crowbar's elbow positioned as a fulcrum on the engine case below the distributor. The picture to the right showing the crowbar position is with the distributor cap on. In the actual procedure, the distributor cap has previously been removed.


  • With the hold-down removed the distributor is only held in place by its O-Ring seal's resistance and should pop loose from the engine case with very little force. If you are using more than very little force, stop what you are doing as something is not right. Once the seal breaks loose do not remove the distributor just yet.

  • Take a 2nd picture as above after slightly lifting the distributor just to the point where its drive gear inside the engine case disengages while not completely removing the distributor. As the distributor slides off its gear engagement the rotor's position will move slightly. With careful observation, one can see the rotor move slightly as they lift. If it stops moving while lifting the gear is fully disengaged.
    Rotor disengaged


    • When reinstalling the serviced distributor use: 
      • The 2nd picture taken to preposition the rotor before reinserting the serviced distributor into the engine case and; 
      • The 1st picture taken is used to validate the rotor's correct final position once the distributor is fully seated.
    • By doing the above procedure one will avoid the top-dead-center alignment shenanigans by simply reinstalling the distributor back in the exact rotational position that it came out with.
    • Use some hose wrapped in electrical tape to protect the dual distributor's exposed drive gear during shipment to the rebuilder. Also, package the entire assembly tightly in its shipping box as it has considerable mass and otherwise it may slide around in the box damaging it.
    • Once removed the distributor can be sent out for servicing. It seems the availability of parts and other issues have made getting a properly executed servicing a challenge for some. One source of rebuilding that has proven to be reliable: 


    If you found this page informative return to the main page and bookmark it for future 993 related servicing, repair, and upgrading guidance & information. If it saved you some time, aggravation or even some coin consider a donation through the button on the top left margin of this page.

    #ignition #timing #distributor #dual #bosch


    Saturday, September 19, 2020

    Safety Update - adding automatic door locking to your 993 - a really convenient addition!

    Since the 993 already has electric door locks adding a timer that locks the doors a few seconds after the ignition key is turned to the accessory position is an easy DIY project. This is a significant convenience and a safety feature. One of the best additions I have ever done to my car!

    Disclaimer: The content of this page, relates specifically to the Porsche 993 (911 1995 to1998) The author here is not a professional automotive technician and some of the procedures described on this page may not be the best to use in all situations. Though the author strives to provide completely accurate and appropriate information and attempts to keep it up to date, in some cases, some of the information you find on this page may be outdated or in error therefore, please feel free to use the information on this page at your own risk.

    Parts needed:

    • Altronix 6062 Multi-Purpose Timer
    • A length of  red automotive 18 to 16 Gauge primary wire; 
    • A length of  black automotive 18 to 16 Gauge primary wire; 
    • A length of  an alternate color automotive 18 to 16 Gauge primary wire;
    • A box to contain the timer circuit board, I used a plastic soapbox;
    • An SPST switch with pigtail wires attached.


    Supplies needed:

    • Soldering Iron and thin gauge rosin-core electrical solder
    • Scotch-Lock splice terminals (alternative to soldering)
    • 3M  Type 88 or 33 electrical tape
    • A small amount of open-cell foam padding

    Procedure Steps:

    • Carefully read all the steps in the below procedure before beginning;
    • Set the 4 switch settings on the timer's circuit board to the ON position;

    • The jumper 2 labeled "J2" is to be cut, disconnected, on the timer's circuit board;

    • Use a length of Black primary wire to attach the timer's terminal marked as negative (-) to a chassis ground or any ground wire such as the one leading to the radio. Ground wires are usually solid brown in color on a 993;
    • Circuit Board Terminals
    • Use a length of Red primary wire to attach the Timer's terminal marked as positive (+) to a switched power circuit. This can be attached to the ignition switch accessory position pin or the switched power wire leading to the radio. If one has added a switched power outlet to their dash it can be attached to that circuit as well;
    • Install a toggle switch inline along the red wire above used to disable the automatic door locking function. This is needed when going through the program steps to mate new key fobs to the car.
    • Use a length of the alternate color primary wire to attach the timer's terminal marked as normally open (NO) to one side of the central locking rocker switch in the center console;
    • Use a length of the alternate color primary wire to attach the Timer's terminal marked as the common connection (C) to the other side of the central locking rocker switch in the center console;
    • Test the timer with the ignition key and adjust the time of the delay using the thumb wheel on the timer's circuit board. Set it so the doors lock in a little less than a 10-second delay from turning the key to the accessory position. Do not make it any longer or under certain conditions, one may inadvertently lock themselves out of their car.
    • Encase the timer in the plastic box using some foam as padding so it doesn't abrade against the inside of the box from vibration over time and to avoid rattling around in the box
    • Cut a slot in one end of the box so the wires have a path to the outside and add a little electrical tape over the wires where they contact the slot so they are not damaged over time.
    • Tuck the box and the earlier added disable switch in a convenient place under the dash.
    • Make a note in the Owner's Manual of the need to use the disabling switch installed in this procedure when mating keyfobs to the alarm system.
    • This modification is IMMO BLOCK compatible.
    • Also, consider adding a headlights' left-on warning buzzer to avoid running your battery down when parking and inadvertently leaving your headlights on.

    If you found this page informative return to the main page and bookmark it for future 993-related servicing, repair, and upgrading guidance & information. If it saved you some time aggravation or even a little coin consider a donation through the button on the top left margin of this page.


    #alarm #door #locks 


    Wednesday, September 16, 2020

    Cable and other tie-down identification for the the more fastidious among us.

     My 993 is a daily driver and is well cared for as I need it to be reliable and problem-free. Others who view their 993 as a collectible are a wee bit more fastidious than I.  Places I use a tie-wrap to replace an original tie-down some folks prefer replacing the failed or missing one with an identical part to keep things original. Below is a picture with part number labels for may of the most common cable and hose tie-downs for those so inclined.


    #cable # wiring # harness # clips #tie-downs #tie #tye #clips # clips #wire #line #hose  #electrical


    Wednesday, September 9, 2020

    Adding an emergency engine lid release cable to your 993

    It is interesting that the 993 Carrera comes with an emergency Frunk cable release located behind the driver side wheel well liner. It doesn't come with one for the engine compartment. 

    I have read horror stories about the rare occurrence when the engine lid release cable fails. If you have a Carrera with the regular moving spoiler, I understand, one can with, a little effort fish a  wire hook through the spoiler, and release the lid latch. To make releasing the latch easy an emergency release cable can be added.  

    If your car has a fixed-wing, for example, the Aero factory wing or a Turbo wing fishing a wire through the wing's grill to release the latch is not going to happen and you are stuck. 

    Here is how to easily add an emergency release cable to your 993 if not already present. 

    • Used a length of solid core steel galvanized machine or picture hanging wire to create an emergency latch pull cable;
    • Remove the left had rear turn/stop light fixture (on left-hand drive cars) 
    • From inside the engine compartment, drill a small hole behind the driver side turn/stop light fixture and use a little touch-up paint to protect the raw metal where you drilled. 
    • Pick a spot to drill the hole so a pull cable threaded through it leading to the latch is:
      •  Unobstructed and; 

      • In nearly as strait a line to the rear edge of the engine compartment leading to the latch as possible. This is so the release works smoothly when pulling the cable.

    •  Fish the wire through the hole behind and slightly above where the stop/turn light fixture is mounted; 
    • Thread the wire along the rear edge of the engine compartment and through the extra hole in the latch mechanism release lever and; 
    • Tie a small machine nut on the end of the wire as a slip-stop versus directly attaching it to the lever. 
    • In this way when using the regular latch release cable the added cable doesn't flex or bind it just slips through the lever's hole. But when one pulls on the added cable the nut acts as a cable stop.
    • Coil up an extra length of wire behind the lamp housing and reinstall the turn/stop fixture. 
    Takes all of ten minutes to do.

    Andy

    Saturday, September 5, 2020

    Resolving Interior Lighting \ Alarm\ Immobilizer Problems or Faults

     In a 993 the interior dome lights, the glove box light, the frunk light, and their fixtures and switches are all related to the Alarm and Immobilizer so any bad behavior of any of these components can result in:

    • The LEDs on the door sills flash in couplets indicating an Alarm/Immobilizer fault;
    • The flashing of the fob light in the clock indicates an immobilize fault;
    • The interior cabin dome and frunk light do not go out when the doors and frunk are closed and locked with the fob;
    • Additionally, the glove box and frunk stop illuminating when they should;
    • The Engine compartment light stays illuminated or will not illuminate;
    • The battery is discharged due to a parasitic load due to one of the above reasons.
    • If you are only experiencing the inability to program fobs and all other aspects of the interior lighting and immobilizer/alarm are functioning properly look to the bottom of this page for things that will interfere with completing the programming process.

    99% of the time any of the above faults can be sorted out by replacing a bulb or fuse or cleaning a lamp socket or switch. Here is a sequence of events to sort out such issues before bringing one's car to a professional for resolution.

    Before beginning the below testing procedure remove any LED bulbs and replace them with the originally specified incandescent bulbs used in the interior of the car, the glove box, the frunk, the engine compartment, and the related warning lamps in the clock. 

    Also, since we are not the engineers who originally designed these systems the below procedure steps and sequencing is based on making assumptions about the operation of the systems involved from our and others' observations clearing issues and some of these assumptions may be in error.
    • Checking the engine compartment lamp function (alarm/immobilizer related):

      • If the engine compartment lamp simply won't go out when the latch is closed it can be a stuck lower latch switch from dried grease. Flood the lower latch with CRC QD Electronic Cleaner, or other "electronics" cleaner spray while cycling the latch several times using a screwdriver to set the latch and pulling the release lever on the latch to open the latch.  If the issue is resolved lightly grease the capture mechanism with a very small amount of white lithium grease, release the latch and close the engine lid.
      • Do not use something called electric motor cleaner as it may attack the plastic parts in the latch switch.
      • If the lamp simply won't illuminate first pull the fixture and check the bulb, its fixture, and connection spades;
      • Reinstall the lamp housing. It is very easy to short out the lamp housing to the body by removing it or reinstalling it so check its fuse once reinstalled;
      • Pull apart the pigtail connection to the switch that is part of the engine lid lower latch and short out the wiring harness plug normally attached to the switch pigtail. If the light goes on the switch may have become stuck from dried grease. Flood the latch with electrical contact
        cleaner spray while cycling the latch several times using a screwdriver to set the latch and pulling the release lever on the latch to release it. If the issue is resolved lightly grease the capture mechanism with a very small amount of white lithium grease, release the latch and close the lid;
      • Close the engine compartment lid before going to the next step.
    • Check the frunk compartment lamp function (alarm/immobilizer related):


      • If the lamp simply won't illuminate: 
        • First, pull the fixture and check the bulb the fixture, and its connecting spades.
        • Reinstall the lamp housing. It is very easy to short out the lamp housing to the body by removing it or reinstalling it so check its fuse once reinstalled;
        • Also, its connection spades come loose easily so make sure they are fully seated and don't ground to the underside of the hood sheet metal when the fixture is installed
        • Pull apart the pigtail connection to the lower latch switch that is part of the frunk hood lid latch and short out the wiring harness plug normally attached to the switch pigtail. If the light goes on the switch has become stuck from dried grease. Flood the latch with electronic cleaner spray while cycling the latch several times using a screwdriver to set the latch and pulling the release lever on the latch to open the latch.  If the issue is resolved lightly grease the capture mechanism with a very small amount of white lithium grease, release the latch and close the frunk lid.
      • If the lamp simply won't go out; 
        • Check the lamp fixture's connection spades don't ground to the hood when installed;
        • If the frunk light won't go out when closing the hood latch with a screwdriver try unplugging the lower hood latch switch pigtail, 
        • If the lamp goes out when the latch pigtail is unplugged the switch in the latch has become stuck from dried grease. Hose out the latch with electronic cleaner spray while cycling the latch several times using a screwdriver to set the latch and pulling the release lever on the latch to open the latch.  If the issue is resolved lightly grease the capture mechanism with a very small amount of white lithium grease, release the latch and close the hood;
        • If the light still doesn't go out with the latch pigtail unplugged the problem lies with the dome lamps, the glovebox lamp, their switches, or the controller as they all share an integrated function with the alarm/immobilizer;
        • Close the frunk lid before going to the next step in this process.
    • Check the glovebox lamp function (alarm/immobilizer related):
      • The lamp should illuminate when the glove box is opened and go out just before it is fully closed and latched. If it stays on inspect the plunger switch's function and its installation to see if it is being adequately compressed when the door to the glove box is closed; 
      • If not working correctly it will cause a fault;
      • If the glovebox lamp won't illuminate check the fuse it shares with the frunk light pull and inspect the bulb and fixture then pull and test the switch by simply shorting it out and see if the lamp illuminates indicating a bad switch;
      • Once any issues with the glove box lamp are resolved close the glove box before going to the next steps below.
    • Checking the dome lights(NOT alarm/immobilizer related):

      • If one of the dome lights illuminates but the other does not check the problem fixture's rocker-lens switch position. It should be in the center dome-light-off when the doors are closed position. 
      • If it is, pull and inspect the bulb, fixture, and its connections;
      • If neither fixture illuminates pull both fixtures and check the bulbs, the fixtures, and their wiring for a loose or pulled-off connection spade.
      • Once both fixtures are reinstalled check the fuse in the frunk fuse box; 
      • If both lamps fail to go out when the lamp rocker is in the center position and the key fob is used to lock the doors or the doors are simply closed and the lamps remain illuminated after a short timed period the problem lies elsewhere;
    • Checking the door jamb switches (alarm/immobilizer related):
      • If the dome lights fail to illuminate open both doors.  If opening a second door causes the dome lights to illuminate the door jam switch on the door that did not cause the dome lamps to turn on alone has a bad or dirty switch or its wiring harness connection has come loose. 
    • Rebooting the alarm/immobilizer:
      • Disconnect and reconnect the car battery to reset any internal corruption in the controllers.
    • Ignition Keyway Switch: 
      •  The ignition lock has a switch referred to as "Switch Buzzer Ignition Lock" that senses that the ignition key has been removed and the deadbolt to lock the steering column has been triggered The switch's connection can be seen as the bi-post plug along the shank of the ignition switch steering lock bolt assembly in the picture to the right. The switch may be broken but more likely just stuck or dirty from dried lubricant;

      • Try cleaning the switch by flooding the ignition keyway with a spray electronic cleaner using the thin extension tube that comes with the spray can. 
      • Then insert and turn the key clockwise past the unlock position then; 
      • Turn it counterclockwise and remove the ignition key;
      •  Turn the steering wheel slightly if necessary to assist in locking the steering column;  
      • Reflooding the keyway and repeating the sequence several times and see if it resolves the issue; 
      • Put a square of cardboard over the floor carpet under the keyway to capture any solvent and old lubricant that may drip under the dash during this process;
      • Be aware that the ignition lock assembly needs never be replaced as both of its switches can be replaced and a locksmith who works with automotive locks can service its mechanical components avoiding the $1000+ expense of having a new lock purchased from the dealer and keyed to your car.  
      • This particular procedure is prompted by others' suggestions that the stuck switch may be the cause of a flashing fob warning lamp in the clock indicating a fault. Once cleaned put a very small amount of light oil on an ignition key and insert and remove it from the keyway a few times to lubricate the lock cylinder pins. Over-lubrication of the lock may cause problems down the road as dust and debris will tend to gum up the lock.
    If after working through the above one still has an issue it may be the alarm or ignition immobilizer controllers under the seats. If you have problems with the remotes working with fresh batteries one can consider the fix described on this page.

    Here is what the  993 Master  - Tore from Bergvill F/X Electronics suggests on the  topic of a parasitic electrical drain that causes a dead battery when a 993 is left standing and is related to the above topic:
    https://www.bergvillfx.com/categories/964993-current-measurement

    Continuous flashing Immobilizer light that does not extinguish:.
    In addition to the above if you find the immobilizer light in the clock seems to flash continuously as you drive the car and doesn't extinguish after a short period check the state of charge of the car's battery as the Immobilizer doesn't seem to like a weak (low voltage) battery. Some have also suggested detaching and reattaching the car battery may also clear the continuous flashing issue.

    #Immobalizer     #alarm #lamp #lamp #fixture #interior #lock #ignition #key #latch #switch #frunk #lid #glove #box  #glovebox #parasitic #electrical #drain