Google Analytics tags

Tuesday, August 31, 2021

My experience getting the left front Jacking/Lift point repaired:


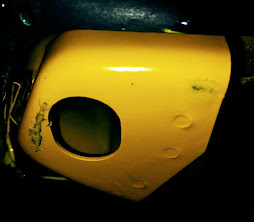
The new foot installed & painted.

 Like many 993/964 cars, the front left factory lift point foot has collapsed on one side and folded under on my 993 so I was unable to lift that corner of the car using an emergency jack or mount the car on lift bars to safely lift the vehicle for servicing.

How to lift a 993/964 safely including using Lift Bars or other methods is described on this page.

The original foot bent sideways
 under the car.
My experience:
The biggest hurdle in getting this fixed is finding someone willing to repair it.
The local Porsche-Certified body shop gave me an irrationally high price, north of $2000. They did not turn down the work but their pricing for a small job like this was clearly communicating they didn't want the job possibly due to the perception of risk on such a small job.

It turns out I was referred to a local custom hot rod shop that does welding by a fellow who has done paintwork for me before.
Here in the South, it's all about relationships as the welding shop owner told me he ordinarily doesn't work on Porsche but since he had gotten a referral call-ahead from a friend he was willing to do the work.

  • I supplied a replacement lift point foot 964-501-297-00 and instructed the welder to repair the existing foot or use the replacement supplied whichever one works for a solid functional repair.
  • I also supplied the welder with an anti-corrosion chromate primer and a compatible body match color coat in spray cans to seal up the job against corrosion.
  • We also discussed that the easiest way to remove the floor pan insulation, if needed, in the driver footwell is to cut around the periphery of the footwell with a mat knife and lift it out in one piece where it can be dropped back into position when the job is done.

It surprised me that there really is no detailed documentation anywhere on the Internet on how to do this repair. For this reason, I would have loved to document the work by the welder in pictures for this blog but I got the feeling this would have been a little bit of an overreach in our relationship and I was just glad to find a shop willing to do the work.

Having completed the repair. Here are pictures:


Top view showing the bent wall,
&  failed welds  in the foreground
Not sure if the foot's wall not being quite strong enough folded pulling two of the spot welds off or the spot welds were simply not strong enough and pulled loose allowing the sidewall of the foot to fold. The root cause of the failure was probably a combination of the two.

In any event, the fellow who did the welding felt it was not a very difficult job, swapping out the old damaged foot for new, just being careful not to damage the lines that run next to the foot under the body. From start to finish the job took a couple of hours.


Bottom of the old failed foot
Showing a bent wall in the background.
 

Recently I ran across this on Facebook.
It looks like someone has a solution to avoid the jack points from collapsing on a 993 (no affiliation).
To contact Marc, join Facebook if you are not already a member and join the 'Porsche 964 Group" and send him an inquiry.
Andy


If you found this page informative return to the main page and bookmark it for future 993-related servicing, repair, and upgrading guidance & information. If it saved you some coin consider a donation through the button on the top left margin of this page.


Sunday, August 29, 2021

How to address water leaks, wet floors and restore wet under seat controllers.

There are really only three causes of a wet floor in a 993:

The dead giveaway that clogged sunroof drains is the source of the leak is that when one peels back the inside surround along the top edge of the windshield it will be wet.

The remedy is rather straightforward. Make a plumbing snake out of a section of 12 gauge insulated solid-core primary electrical wire dulling the end so it does not puncture the drain tubes. The wire is easily purchased by the foot at most home improvement or hardware stores.

Open the engine lid. Under it on the top left and right corners you will observe the sunroof gutter drain outlets in the body sheet metal behind the lid hinges in the picture below:


Use the snake, gently slipping it up the drain outlet tubes to clear any clogs from the tubes. Be gentle and do not use a high level of force if the snake hangs up a little back it out and try again possibly with the end bent in a slightly different direction as the goal in this is to not damage the drain or its terminations.

To test the drains close the sunroof and with a slightly flowing garden hose wet down the sunroof seams and observe the broken free debris and water emanating from the two drains.

An alternative process could be to use a little compressed air at the drain outlets to blow any debris obstructing the top end of the drain tubes seeing that the top ends are not so easy to get to without some disassembly of the roof panel. Be sure to not use too much pressure as one doesn't want to blow the tubes free of their top-end moorings.  If you take this approach you may want to consider protecting the open roof from splatter and find any solid debris that is forced out the drain entrances so it doesn't just flow back into the drains.

Once the drains appear to be cleared leave the vehicle out in the sun with the sunroof partially open to bake any moisture trapped in the headliner out of the cabin and mop up the floors. This may include pulling back the carpet in the footwells and removing the floor pan soundproofing foam rubber inserts, laying them out in the sun to bake dry. To remove the inserts minimizing damaging their black rubber laminated top consider cutting them loose around the edges using a razor utility knife. Once dry they can be dropped back into place as is.

How to dry out water-soaked footwell and address any under seat controllers that got wet:
  • Pull up the carpet
  • Using a utility knife neatly cut the black rubber floor pad around the preifery of the footwell
  • Lift the molded floor pad out of the car and leave things open to dry.
  • Once dry reinstall the floor pad in position and reinstall the carpet.
  • If you are concerned that any of the controllers or audio components under the seat got wet and before having them repaired consider the following procedure to restore them first:
    • Disconnected the car's battery before starting the below steps
    • Here is a page on how to remove the seats to gain access to the controllers.
    • If a security cover is present, drill out the security rivets on the cover over the controllers under the seat.
    • Use a shop vacuum to clean out the metal shards left from drilling before unplugging the controller to avoid contaminating the electrical connections.
    • Unplug and open up any controllers including the DME that got wet and blow-dry their guts out with a hairdryer. Also,
    • Blow-dry any connectors to them.
    • Use some spray electronic cleaner to hose off the last bit of moisture and contaminants from the boards and connectors once they appear dry.
    • If you are handy with a soldering iron this is a good time to inspect the boards for cold or oxidized solder joints or traces and reheat or tin them as appropriate.
    • One can also consider the remote keyfob receiver upgrade discussed on this page.
    • Close up and reinstall the controllers
    • Replace the shield cover if present when finished with some self-tapping machine screws as it may be providing some required electrical shielding.
Fogged dash gauges:
Some have experienced fogged dash gauges on the inside of the gauge glass and attribute this to excess humidity in the cabin from a water leak. I have been unable to corroborate this as the root cause but it is something to keep in mind as a potential early warning of a water leak that should be investigated.

If you found this page informative return to the main page and bookmark it for future 993 related servicing, repair, and upgrading guidance & information. If it saved you aggravation, time & effort or some coin consider a donation through the button on the top left margin of this page.