
Excessive Oil Consumption or simply a little blue smoke at startup & the Top-End Rebuild - This is a procedure 993/964 owners are asked to consider by enterprising mechanics. It is concluded that the valve guides are worn to the point that excessive oil is slipping past them and burning. Oil consumption and or blue smoke at startup alone is never an indication of the need for a top-end rebuild. Blue smoke at a startup usually has to do with oil vapor from the oil tank condensing on the inside of the intake manifold and being drawn into the engine at startup and burning, a perfectly normal condition.
A recent posting on Facebook in a Porsche 993 Group:"I’m getting blue exhaust when I start the car. My mechanic says it’s a $15 k fix."

“How full do you keep the oil tank? When I kept mine at the full level [on the dipstick] I'd go through easily a qt. per 600 miles, now I keep it at min - 1/4 [of the range on the dip stick] I use barely a qt. every 2500 miles. Even now, after spirited driving, the oil can expand to over 1/2 full [on the dash gauge].”
The implication here is that a true measure of a full oil tank is variable, and frequent overfilling may contribute to the perception of excessive oil consumption where none exists. Could burning the ingested overfill explain the blue smoke at startup? Over time, misfires or clogged secondary air injector ports may be a related self-inflicted service issue caused by simply overfilling the oil. Seems a lot more feasible as the common root cause than leaking valve stems.
I change my own oil. Here is the oil fill procedure I use today to

Address the whole overfill conundrum, use it at your own risk as I am not a professional automotive technician. If you have any concerns about aspects of the procedure, contact a professional for their advice.
- If your car still has the under-engine cover/tray, remove it and store it away, as some folks think it just hides oil leaks and causes the engine to retain heat. I feel it serves little purpose beyond making it more difficult to change the oil. It has gone missing on most examples of a 993.
- Release the back half of the right side plastic rocker panel cover to gain access to the oil tank drain plug. If you lift your car with lift bars, completely remove the rocker panel cover before placing the lift bar under the car.
- Park the car on level ground & engage the parking brake
- Break free the right rear wheel's nuts and leave them slightly snug, this being the passenger side of USA-delivered cars. The right side of the car is on the right-hand side when you are standing behind the car looking forward. If you use LIFTBARS to lift your car, it may be necessary to remove the entire rocker panel cover strip before lifting the car, so it doesn't interfere with getting to the oil tank.
- Lift the right rear wheel off the ground and put it on a jack stand. To safely lift a 993/964, a DIY procedure can be found at Jacking Up A 993 Safely
- Remove the right rear wheel and the front half of the wheel well liner, and release the back half of the plastic rocker panel cover strip.
- There is a rearmost special clip that holds the rocker panel strip in place on a 993. Many times it is broken and can be replaced if needed. On the 993 Carrera, it is a 999.507.373.00 for wide-body 993 cars, it is a 999.591.990.00
- I drain the oil tank and the engine case into a drain pan of at least 10 to 12 quarts in capacity. Do not attempt to drain the oil using a vacuum oil remover through the oil filler neck; it will not work and can easily damage or bend the oil level float arm in the oil tank or puncture the filler hose to the tank. The engine case drain plug is on the bottom of the engine case and points to the left side of the car.
- Use care not to over-tighten the oil tank plug, causing galling.
Galling is a form of adhesive wear that occurs when two metal surfaces, like two aluminum surfaces, slide against each other under pressure. This can lead to material transfer from one surface to the other, creating surface damage and increasing friction. In severe cases, galling can cause the surfaces to cold weld or seize together, making separation difficult or impossible. The hollow-spoke wheels offered on the 993 have the spokes attached to the barrel using friction welding. In essence, gauling taken to the next level.

Heater Control Box - I reach under the car through the right rear wheel well, and I replace both filters. This requires removing Phillips screws, hex screws, and plastic hex flange nuts holding the front half of the fender liner and the back half of the plastic rocker panel cover.
- I then detach the forward-facing red rubber duct from the right side heater control box hanging below the engine and tuck it out of the way.
If one of the heater control boxes seems to be hanging low, it may need one of its rear-facing rubber ducts replaced. Here is a page that discusses doing this:
https://993servicerepair.blogspot.com/2026/04/heater-control-boxes-ductwork.html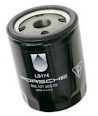
- I use large Channel-Locks pliers to initially break loose both the small and large filters. Removing the small filter will be messy; cleaning up after installing the new filter is discussed later in the process. When installing the new filters, I rub a little old oil on the rubber seals on the filters before threading them in place. I make both replacement filters as tight as I can with my bare hands and then turn the filter a quarter-turn beyond this with the pliers. Although not a factory method, I have never encountered a filter backing off or being unable to remove one with this method.

- The oil filters are:
- 993-107-203-05* for the small filter;
- 993-207-201-03 for the large one.
*If you use an aftermarket branded filter such as MAHLE, BOSCH, or others on the Turbo model, be sure to use one that incorporates an internal anti-drain back check valve like the OE filter. Generally, the aftermarket small filter part number crosses to a 993-107-203-03 Porsche part number, and then one of the premium series in that brand under that cross includes the internal check valve. In most cases, the check valve can be seen through the small oil passageway holes in the bottom of the filter when it is compared to one without the valve. The valve is thought to minimize smoking at startup.
Filter's internal
anti-drain back
check valve- Because of ready availability, I use Mobil 1-FS X2 5W-50 or Mobil 1 15W-50. These oils have slightly higher zinc levels, which are thought to help extend the life of the valve train in our cars' engines, but not so high that they may shorten the life of the catalytic Converter(s)
If you see your oil pressure gauge regularly dip below 2 Bar at idle under normal operation, consider switching from the recommended 50-weight oil to a 60-weight oil.
Other brands with similar published specifications will work just as well. Oil recommendations can be a rancorous discourse in our community; my answer to this is "to each their own."
I do not disconnect the rigid metal oil tube below and slightly to the rear of the smaller filter on the engine case even though it is specified in the factory procedure. My belief is that breaking the seal on the tube presents an unnecessary leak failure mode and the quantity of oil present in the lines is small. Also, others have found removing a tube that is not removed regularly can be problematic resulting in it being damaged and needing to be replaced, a real pain to do.
3/29/2026 Rennlist member Kein_Ersatz provides additional insight into why some folks may experience a leak after reinstalling the tube when replacing the used O-ring before reinstalling the tube: " [The] New O-ring if that gets damaged / torn / preventive, otherwise [reinstalling the tube without leaking is] straight forward to do."
11. I do keep two cans of spray electronic parts cleaner on hand to clean off oil spilled on the engine, suspension, and the Heater Control Box & duct from removing the smaller filter.
12. When replacing the engine case and oil tank plugs I replace the crush rings and the "O" ring on the tank plug.
 |
| Crush Rings |
- The part number for the oil tank drain plug crush ring is 900.123.118.30 and seems to have critical dimensions, so the dealer part should be used.
The engine case drain plug for the MY1995 and earlier is 900.123.118.30, and for MY1996 and later cars, it is 900.123.011.30. The part numbers seem to be interchangeable as they are described as the same A-22mm ID x27mm OD size and are made of aluminum.Oil Tank
Drain Plug
O-Ringg- The heat-resistant Viton oil tank drain plug part number 999.701.269.40 is sized at 11x2.5.

13.On occasion, I have reused the existing metal crush rings and heat-resistant "O" ring with no leaks. Be sure not to overtighten the tank plug, both the engine case and oil tank drain plugs are to be tightened to 50Nm (+5/-0 tolerance) or 36.9 ft-lb (+3.7/-0) according to the factory. A lifetime supply of the A22x27 aluminum crush rings and the heat-resistant 11x2.5 Viton (Fluorine rubber) green O-Rings, for the tank plug can be had on eBay or Amazon for a few dollars.
14. Button up the plastic parts, and the heating duct, mount the wheel and lightly snug the wheel nuts, then put the car back on the ground.
15. Re-torque the wheel nuts to the recommended dry thread value of 133Nm. or 98 ft./lb. (dry) in a cross-wheel star pattern sequence, then check the torque values by repeating the sequence on the now-tightened wheel nuts.
16. Refill the oil tank very slowly using a long neck funnel so the oil does not back up in the funnel or in the oil filler pipe's neck and spills out over the top and all over the place.
- Stuff some rags around the filler neck to catch any incidental overflow.
- Running the engine for a few moments once six or seven quarts have been added, charging the oil filters seems to reduce the tendency for the oil to back up when filling the oil tank further.
- Spilled oil is hard to clean up completely and many times shows up days if not weeks later under the car where it is misdiagnosed as a leaking lower right valve cover, go figure?

Long Neck
Funnel
17. Fill with 8 quarts +/- of oil and run the engine to a fully warmed state. This can take a 20-minute drive to achieve, looking to the temperature and oil pressure gauges to see if they have settled into their normal operating range.
18. Then, with the engine, still running, add additional oil, a few ounces at a time until oil registers on the dip-stick at approximately 1/4 of its scale with the car on level ground.
 |
| Dip-stick |
- The oil fill difference between the top and bottom of both the dipstick and the gauge is rather small so take your time adding oil in small increments while rechecking the dipstick.
- If you find yourself putting ten or more quarts of oil in, using this procedure, you are most likely overfilling the engine. On a 993/964, this can have serious operating consequences, and so an overfill should be addressed as soon as possible. The easiest way to address an overfill is to shut off the engine and drain the oil from the engine case, as the case retains a smaller volume of oil; most of the oil is retained in the oil tank. Once drained, it can be added back in, if needed, to readjust the level.
If you are having a shop change your oil for you:As of late I have heard of incidents where a Porsche specialty service shop has overfilled the oil. This seems to suggest properly adjusting the oil level in a 993/964 is not universally understood even in the professional Porsche servicing community. Knowing this it may be best when having your 993's oil changed to specify that the technician only put 8 quarts in and no more. Then once you have driven your car home personally adjust the final fill level in your driveway.
- When buttoning things up be sure to reinstall the rocker panel cover. If left off the bottom edge of the rear wheel well liner will not be tied down and at speed will be drawn into the tire damaging it.
If you suddenly experience what appears to be an oil leak shortly after an oil change by others, here are the probable causes.
The final steps I have added with each oil change are to;
 |
| Fanbelt Switch |
- Put a tiny dab of white lithium grease on the center of the side (hub) of the wheel of the fanbelt sensor's roller. Over time, this grease will migrate into the bearing, greatly extending its life and, by extension, the switch's as well.
- Pull off the ignition distributor caps and rotors, and place a drop or two of motor oil on the center of the shafts under each rotor and the mechanism under the doughnut-shaped plastic spark shield over the mechanism below. This will lubricate and help avoid corrosion forming in the distributor mechanism, potentially extending its life considerably. Many forgo this procedure for long periods, as the service intervals for the distributor caps are quite long on a 993/964. In the old pre-electronic ignition days, when ignition points were changed or adjusted every 1500 miles, adding a drop or two of oil was a standard add-on procedure.
- Look under the engine and inspect the heater control boxes.
If one is found to be hanging low or if one of their rubber attachment ducts appears out of position or damaged, consider adjusting or replacing the ducts as needed. Here is a page that discusses this:Heater Control Box
with rubber duct attachments.
https://993servicerepair.blogspot.com/2026/04/heater-control-boxes-ductwork.html

Although some folks feel a little smoke at startup is a big problem, an occasional plume of smoke at startup especially if the car has been sitting for a while is normal for these cars and should be of no great concern. In any event, if the smoking still bothers you there are options to potentially minimize oil smoking at startup on the Turbo 964/993.
One theory is when at rest some oil may backflow into the turbo lubricating system and can cause a small quantity of oil to leak internally to the turbos. This oil will burn at startup making for a blue plume of smoke. Some argue that this is not plausible because at startup the turbos are cold and any oil present will not be hot enough to initially burn and cause immediate smoking. Another theory is that oil vent hoses leading from the turbo and or the oil tank to the intake discharge a small amount oil vapor that condenses on the inside of the intake manifold and this oil is immediatly injested and burns at start-up causing the plume. In any event here is what some have done to minimize smoking at startup.
- Switching to a heavier weight (xxW- 60) synthetic multigrade oil,
- Verifying the oil filters used have the internal valving to limit the back-flow such as the Porsche branded Turbo filters and;
- Making sure the oil is not overfilled (lower 1/4 of dipstick).
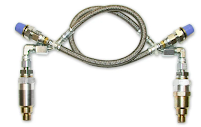
- There is an aftermarket oil inlet check valve
that addresses oil migration from the oil tank to the engine. There are also aftermarket check valve kits some add to the oil feed lines of the turbochargers. I hear that some adapt the 996 Turbo Oil Feed Line Check Valve 99610703079 for use on a 993 as well.

A situation I had with my '86 Carrera, and now some have reported the same issue with the 993, is where untrained hands mistakenly remove the cover of one of the
 |
| Relief valve locations. |
Oil Leaks. - At some point in your car's life, it will leak oil. The 993/964 engine is oil-cooled and lubricated, and the engine itself, unlike other cars, is a vast assemblage of heads, cylinders, case halves, valve covers, oil coolers, and the oil tank, and the list goes on. One can spend a lot of time and money chasing minor oil leaks, an expense that contributes little to the driving enjoyment of these cars. In my book, the main reason to fix an oil leak is that it is dripping on the floor and that bothers you, or it is dripping on the exhaust and smells bad, and the issue returns immediately after cleaning the engine's exhaust as described below. Small leaks other than these or oil wetness on the engine case are not material issues and may be best not bothered with.

Some time ago my car had two apparent oil leaks, one at one of the cylinder head oil return tubes. The other appeared to be on the passenger side lower valve cover dripping on the heat exchanger and smelling up the car, which I am told is a very common occurrence. I researched a DIY valve cover gasket replacement and it seemed simple enough. I went ahead and purchased the new gasket. In preparation, I cleaned the oil off the valve cover and the exhaust using a spray electronic cleaner.
Spray Electronic Cleaner
Afterward, the leak seemingly disappeared. Then I recalled that at my last oil change, I spilled a little oil when filling the engine. I wiped up most of it and hosed off the remainder I could see with the electronic parts cleaning spray. Apparently, it took weeks for unseen oil to migrate to the valve cover and ultimately onto the exhaust.

In retrospect, I wonder how many valve cover gasket or even valve cover replacements have been done on a 993 due to a botched oil change where cleaning was all that was needed. If you are experiencing a leak from what appears to be the lower right-hand valve cover just clean it off with some spray electronic cleaner first and see if it resolves the leak. Also if you are experiencing what appears to be an oil leak after a recent oil change here is a page describing the potential root causes.

 |
| Valve Cover Gasket |
An oil leak on the underside of the Varioram intake:
Another common source of an oil leak is from the underside
 |
| Underside of the Varioram |
of the intake manifold on the Varioram-equipped cars. Oil vapor from the crankcase/oil tank is vented to the engine intake, one of the very first emission control measures put on vehicles in the early 1960s, and continues to this day. The intake manifold is metal and is a lot cooler in many cases than the oil vapor, so it condenses onto the inside of the manifold before it can be ingested into the engine and burned off.
Let's face it, our cars all have some level of vacuum leaks where the Motronic system can, to some extent, adjust for them, and if it's really a problem, operating symptoms would appear or even a misfire Check Engine Light would illuminate. For this reason, I would call a small oil leak here inherent in the design of the engine, and in the absence of other symptoms, where it is verified as a contributing factor, no action should be taken. Sometimes a problem is only a problem because one keeps thinking of it as such.
"I [purchased] a 97 C4S that was leaking oil (chain boxes, base gaskets, etc) after basically sitting for 18 mos (~500 miles in 2 yrs). "Drove it every day for a month and voila...all but 1 of the oil leaks stopped"
The above posting seems to suggest that just exercising an engine may cause leaks formed while standing for long periods to diminish, if not resolve themselves completely
Oil Filler Bellows Removal – At this point, it is unlikely that the oil filling bellows is still nestled inside the engine oil filler neck on any 993. It originally was
 |
| Filler Bellows removed |
Oil - I have always used Mobil 1. Although it is called synthetic, technically it is not.

What sold me on Mobil 1 oil was when I first used it on my '86 Carrera. In Cleveland winters, it would take twenty minutes or more for non-synthetic labeled multi-grade oil to warm up enough for the oil pressure gauge to not be pinned at its maximum 5 bar. When I filled the engine with Mobil 1, it took less than 60 seconds from dead cold, as well below 32F, to fall into the gauge's useful range. Most engine wear, I understand, happens at startup when an engine is not yet warm, the oil is thick, and so does not properly lubricate. With Mobil 1, this period is much shorter, as indicated by the oil pressure gauge. In retrospect, almost any oil labeled as fully synthetic will likely result in similar behavior. As a plus, Mobil 1 in the grades needed for a 993 can be ordered online for pickup at Walmart, which works for me. Two 5-gallon jugs cost about $50. Then again, has anyone who does not track their car ever seen a “catastrophic oil-related engine failure” as fear-mongered in oil advertisements? If one changes their oil regularly with the OE-recommended brands and viscosities, probably not.
https://993servicerepair.blogspot.com/2023/01/how-to-keep-your-porsche-engine-running.html
Then Again... Here is what Blackstone Labs, the folks who actually test oils for engine wear say on their website:
"You can go into any mass retailer (Wal-Mart, Meijer, AutoZone, etc.) and buy a 5W/30 (or any other grade) that will perform well in your engine. One of the best-kept secrets of the oil industry is that these store brands are actually the same, quality oils that are produced by the major oil companies. The only difference between these products and the major company brands is the name on the container and the price. Don’t believe us? Try running your own experiment: do a sample on Oil A after a known number of miles, then do a sample on Oil B and compare the wear levels. You may see a little fluctuation, but it’s very rare for one oil to make a significant difference in an engine’s wear patterns."

Manual Transmission Gear Lubricants:
The additive package used in gear lubricant is specific and serves several related purposes. In normal operation, the sulfur/phosphorus additive forms a black sacrificial


No comments:
Post a Comment