Google Analytics tags

Friday, January 21, 2022

Step-By-Step test to Diagnose the Supplemental Air Injection System (SAI)


The SAI pump with its vacuum-controlled
outlet valve attached by a hose to the lower left.

Here is how I would proceed to test the SAI system:

  • If you are using Durametric to diagnose the SAI system make sure you are using the latest software from their site. If not, first uninstall what you have and reinstall the latest version, clear, and rerun the code. Durametric had a known issue related to oxygen sensor-derived codes on earlier software revisions and also with their old-style cable and software.
  • Detach the hose to the new check valve and with the engine dead cold have a friend start the car when you are behind it. If the air pump is working and the vacuum-controlled valve attached to it is opening you will hear what sounds like a jet engine sound for just a few seconds coming from the hose and strong air movement which is the pump running. It should be reasonably loud.

  • If no sound is heard check the vacuum tube connection to the solenoid connected valve. If the valve seems to actuate but the pump seems to not run

  • Check the SAI fuse and relay located in the fusebox on the left-hand side of the engine compartment.

  • If the fuse is good, clean its spades and put it back in, and test or replace the relay.

  • If the fuse is blown then the wires to the pump have probably failed and shorted out a known issue on the 993/964, how to fix them is discussed on this page:

If you found this page informative return to the main page and bookmark it for future 993-related servicing, repair, and upgrading guidance & information. If it saved you some aggravation, time or even some coin consider a donation through the button on the top left margin of this page. 


Tuesday, January 18, 2022

Working with fasteners on your 993/964 or really any series of Porsche.


Early in my career, I worked at a large industrial distributor doing catalog photo work. It was a fastener house among other things. The fastener testing lab was right next to my studio where the engineer there and I became friends doing technical & instructional materials. As a consequence, I became somewhat familiar with how fasteners work. Some of the anecdotal things I learned along the way documenting fastener failures apply to servicing one's Porsche.

A bit of nomenclature:
A cap screw is only called a bolt when it is used in conjunction with a nut. Otherwise, it is called a cap screw, socket head cap screw, or hex head cap screw for example.

Steel is actually very elastic, much like a rubber band. A successful installation of a cap screw has to do with it being stretched by applying installation torque into its elastic range,. In most applications, it should only be stretched to the point where if released it will return to its original length. To ensure this, torque values are specified for various fastener grades & sizes, and application combinations. 
 If installed within this range and the forces applied to the joint do not exceed the clamp load supplied by the installed fastener it will generally not come loose over time. If stretched beyond this point at installation or the joint is subjected to cycling forces beyond its clamping ability it begins to lose clamping force and is subject to failure. This is one of the reasons why torque values are specified for fastener joints on our cars. For our cars, almost every fastener joint has a factory installation torque value specified.

Both an under-torqued or over-torqued fastener invites its failure. Under torqued capscrews will invite loosening from load cycling and will fail. Over torquing will result in stretching the fastener where it loses some of its claiming ability and will also fail.

A stretched Cap screw
Many joints held by fasteners in our cars are in material that is too soft to bring the faster into its elastic range. In such cases, things such as a thread locking compound or lock washers are used to keep the fastener from coming loose. An example in our cars is the steering rack mount where the steel fasteners are threaded into soft aluminum. A very low torque value is specified and a locking compound is pre-applied to the fastener intended to keep the joint from loosening. This is probably why the factory does not recommend reusing these fasteners as the compound may have become compromised.

A lower grade capscrew has a lower capacity for clamp loading
and so a lower installation torque value. However, it generally has a broader elastic range than a higher strength (grade) one and so is more forgiving as to the exact torque applied when mounting them. This is why in many applications where a failure would be catastrophic many times the engineer specifies multiple lower grade fasteners versus fewer higher strength (grade) fasteners to achieve a desired total clamping capacity. 


A Fastener clamp load
testing machine
Similar thinking is likely applied to our cars when it comes to wheel mounting. A five-bolt pattern is used on the wheels intended for street use whereas a single center locking attachment fastener is used in certain racing applications. Center lock wheels create a single point of attachment and so a single point of failure and so must be mounted very carefully with properly calibrated torquing tools, using specific lubricants, inspected often, and worn attachment components replaced regularly to avoid catastrophic failure. This is not practical or achievable in a typical retail tire shop. 

This also suggests when one returns home from a retail servicing/tire shop where the wheels have been removed one can consider loosening the wheel nuts and retorquing them in a star sequence at home with a known good click style torque wrench to ensure their proper mounting.  For dry wheel studs & nuts on a 993 the wheel mounting studs should be tightened to a torque value of 130Nm or  96 ft-lb.

A general-purpose click-stop torq wrench can generally be accurate within +/- 4% over 20% to 100% of its torque setting range. The accuracy of a given new wrench is usually listed in its documentation. To retain its accuracy its adjustment vernier should be unscrewed to the low side of its value range to release its internal spring's loading during storage and occasionally tested or calibrated.

Depositing skin oils on a cap screw's dry threads by simply touching them will profoundly influence the clamping load produced for a given applied torque value. This is why torque values are specified for dry or lubed threads and for critical applications the threads need to be cleaned before using the torque wrench with dry value specifications.

Typical Torque Cart for Lubed/Dry Fasteners  

A minute scratch on the fillet radius where the head of a capscrew meets the shank profoundly weakens the fastener by providing a propagation point for a head failure (pop-off)

Washers have a top and a bottom, the top being smooth
bottom having rough stamped edges. If a washer is put with the bottom facing the cap screw head it can score the fillet radius where it meets the fastener head and significantly weaken the fastener.

On our cars, a critical joint, where having the washer faced up under the capscrews are the screws holding the front seats down. If the washers are placed with the sharp face faced up under the capscrews it can seriously compromise the attachment of the seats.

Here is a page that discusses removing and reinstalling the front seats.

When one gets older their head fills up with experience-based information like the above, approaching yield strength and one has to be careful about scratching their neck or their head might just pop off!
Andy

If you found this page informative return to the main page and bookmark it for future 993-related servicing, repair, and upgrading guidance & information.

Thursday, January 13, 2022

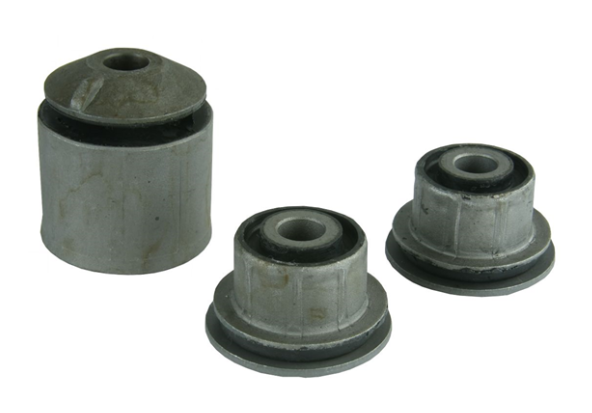
How to remove the bushings from an "A" (lower control) arms without drama.

When rebuilding the front suspension "A" arms on a 993 removing the old bushings can be a real bear of a job. Traditionally a hack saw is used to cut through the bushing's outer tube that is pressed into the "A" arm casting. Then I ran across this approach, using a puller to remove the  "A" arm bushings. I wonder why I never came across this before? 


Here is the video:

https://www.facebook.com/reel/211727354790398


Wednesday, January 12, 2022

Dual Distributor Ventilation kit TSB 9403 1989 964 & Forward

Dealer kit 000.043.202.52 & Porsche Technical Service Bulletin (TSB). The sparks made under the rotor cap create ozone that attacks the dual distributor's internal rubber belt. The added hose kit moves just enough air through the distributor housing to keep the ozone level down. 

In the metal side of the primary distributor is an oblong hole that may or may not have a plastic plug seal in it. To install pry the plug seal out and snap the hose adapter into the hole then attach the hose to it. The other end of the hose attaches to a nipple in the heater ductwork leading from the engine compartment blower. 

This modification should be present on the later 993.


Vacuum Lines & Hoses

 The 993 engine has a vast network of hoses and vacuum lines to it. Here is some information that may help one find there way to where to reattach that loose vacuum line or hose.


Monday, January 10, 2022

Don't replace the ABS pump so fast!

Folks seem to have the habit of pointing their finger at the most expensive and messy part to replace first as a root cause of a problem with their 993/964. This seems to include the ABS pump.

I have a theory that in the case of what appears to be a non-functioning ABS without any On-Board Diagnostic Codes (OBDC) thrown, a pair of faulty wheel sensors that don't signal may result in what appears to be a pump not functioning. When both are faulty or not in position correctly and are not sending a signal to the controller, perhaps, the controller may think the car is simply not rolling.

Wheel Sensor
in Position

Wheel Sensor Replacement Part

What led me to this theory is I once had a left front wheel sensor OBD fault code that I ignored for a long while as it didn't cause a check engine light (CEL), make the car unsafe to drive and it subsequently simply disappeared.  

Subsequently, the ABS seemed to not kick in so I replaced the relays and checked all the fuses, and from their left things alone as I wasn't prepared to mess with the ABS pump. It got me thinking as to where did the fault go? Then I hit upon the idea that if both sensors were not signaling the ABS controller would think the car is at rest without either wheel turning and so the controller's diagnostics saw no functional problem. I have not gotten around to testing this theory by replacing both of the front wheel sensors but eventually, I will. So, for now, it is just a theory however one that is worth taking into account before contemplating replacing or servicing the very expensive ABS pump.

If one's ABS pump is not working I would test the wheel end sensors to check their position and clean their connections before diving deep into the pump. Also, it seems to me that applying 12 volts to the pump and seeing if it runs may be a good test of the pump. It can also be actuated by some OBD readers however using a reader is also testing any control circuit/relay along with the pump.
Ultimately the 993 pumps can be cleaned or rebuilt if needed.

If you found this page informative return to the main page and bookmark it for future 993-related servicing, repair, and upgrading guidance & information. If it saved you some coin consider a donation through the button on the top left margin of this page.


Wednesday, January 5, 2022

Climate Control Unit (CCU) Knobs and Repair Parts


CCU Part Numbers:

993 659 047 00, 993 659 047 01, 993 659 048 00, 993 659 048 01, 993 659 047 00, 993 659 047 01

993 659 048 00, 993 659 048 01, 993.659.047.00, 993.659.047.01, 993.659.048.00, 993.659.048.01

993 659 047 00, 993 659 047 01, 993 659 048-00, 993 659 048 01


 CCU Switch Part Numbers:

944-653-205-00-01C Slide Knob


964-659-146-00-01C Fan Switch Knob 


944-653-208-00-01C Temperature Switch Knob


944-653-922-00 A/C Switch


944-653-921-00 Defroster/Recirculation Switch


The below switch seems to not be available as a specific part number from Porsche or Bosch any longer. However, Tore at Berggvill F/X offers a replacement at:
https://mailchi.mp/bergvillfx/is-it-time-for-fixing-the-ccu-front-panel


Faceplate 993-659-147-00-1DB,Supersedes Part Number(s): 964-659-945-00


964-659-148-00 Sensor Fan See the "What is that buzzing behind the dash?" section on this page.


Also if your CCU doesn't seem able to control one of the HVAC servomotors, after you have verified the motor works correctly Tore at Bergvill F/X offers the following:
https://www.bergvillfx.com/products/tca-2465-servodriver-ic